In order to make jewellery there are a few special tools which make the work easier and give a good quality result. We have listed the most useful ones.
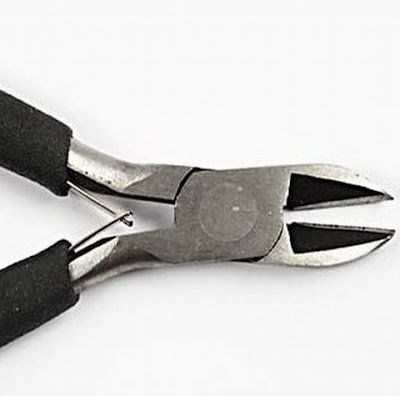
A Side Cutter
A good side cutter is essential. There are many different ones on the market, with end cutters and side cutters. Quite often the one with the side cutter can do the jobs. It can cut up close and is a must when cutting head pins, jewellery chain, metal wire, and beading wire.
Round Nose Pliers
The long, round tip is used for bending wire and head pins. The size of the loop made with round nose pliers depends on which part of the tip is used for shaping the loop. If you want to make several loops all in the same size, you may draw a marker line on the exact part of tip of the round nose pliers.
Chain Round Nose Pliers
These are used for holding, for opening and closing round jump rings.With the thin tip it can get into small areas where there is not much space. It may also be used for bending head pins and wire. The jaw is flat but round on the outside.
Flat Nose Pliers
May be used for holding, for opening and closing round jump rings. The jaw is flat, like the pliers on the outside.
Bent Nose Pliers
The curved shape and long tip allows you to get to where it is otherwise not easy. Can hold, open and close round jump rings. The jaw is flat, but the pliers are round on the outside and can therefore be used for bending head pins and wire.
Crimping Pliers
This tool can make the closing with crimp beads smaller than when using flat nose pliers. They may also be used for putting in the cut-off end neatly when making a coil from wire or from a head pin.
Nylon Jaw Pliers
This tool is suitable for squeezing jewellery components without scratching them. When working with soft or shiny jewellery components, this tool is indispensable. It is also suitable for straightening bent metal wire Squeeze hard with the nylon jaw around the wire and pull the wire through the jaw.
A Bead Reamer
This is a special battery operated machine for cleaning and adjusting the bead holes. Hold the bead and the tip of the reamer in some water, and sand off any bumps from the bead hole. The reamer tips are conical and this tool comes with two reamer tips. You will need 2 AA batteries which are not included.
Beading Needles
These beading needles are made from two pieces of thin wire with a specially designed loop which “collapses” when threading the needle through a bead. The needle is long and therefore you can thread more beads and thread “hollow” beads. Available in various wire thicknesses and lengths.
A Bowl for Beads
This is a practical small bowl for the beads you work with. The triangular shape makes it easy to pour the left over beads into the the bag or container.
A Bead Board
This is a practical solution for designing necklaces before threading the beads onto the wire. The three slots on the table are used for laying out your beads in the right order for your jewellery. When the design is ready, the beads may be threaded onto the wire.
A Jewellery Mat
A beading mat as an underlay prevents the beads from rolling away, and you also have somewhere to attach the beading needle when not in use. Convenient as an underlay, which also protects the table.


.jpg)
.jpg)

.jpg)
.JPG)
.JPG)


.jpg)


